


How to Map Termite Monitoring Stations Around Your Property

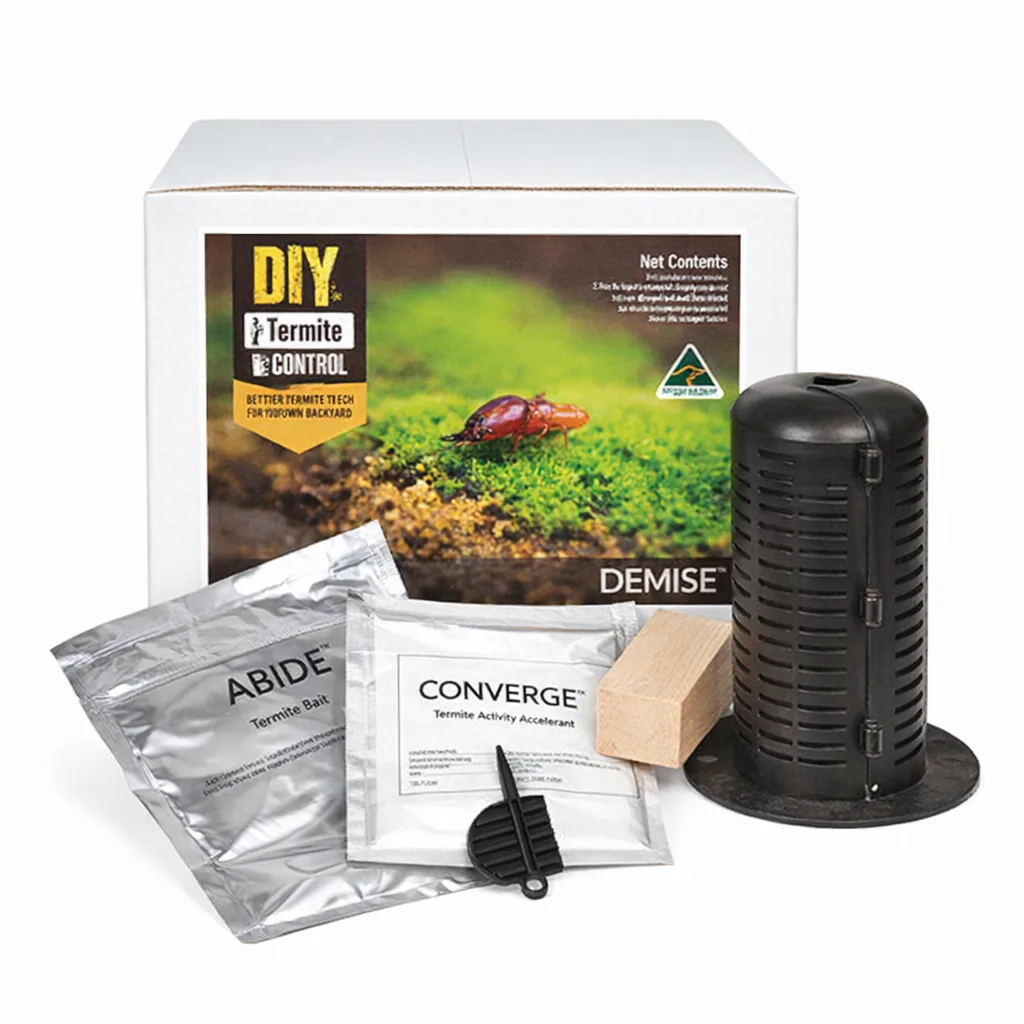
Mapping termite monitoring stations is about creating consistent coverage while giving extra attention to places where termites may forage. For the Demise DIY Termite Detection & Elimination Kit, a simple property map can help you plan the 10 stations, record their locations and make future inspections more reliable.
At a glance
Sketch the Property
Use a simple site sketch to number and locate all 10 stations.
Space Stations Evenly
Plan general coverage at approximately 3–5 metre intervals.
Mark Risk Areas
Prioritise wood piles, stumps, fences and other vulnerable areas.
Keep Inspection Records
Record final positions, dates and activity for every station.
Follow Up Regularly
Check initially every 8–12 weeks, then more often when active.
Start with a property sketch
Draw the home, garage, sheds, decks, retaining walls and other structures on a basic site plan. Mark doors, paths, driveways, garden beds, paved areas and services that may affect where you can dig. The map does not need to be architectural; it needs to be clear enough that another inspection can identify each station.
Use the building perimeter as your main reference line. Number the planned stations in a logical direction, such as clockwise from the front gate. Leave room beside each number for the installation date, inspection dates and notes about termite activity.
Plan the main perimeter coverage
The supplied Demise guidance recommends placing stations at approximately 3–5 metre intervals around the home. Begin by measuring the accessible sections of the perimeter and marking likely station points on your sketch. Distribute the 10 stations as evenly as practical rather than placing them all in one garden bed or along the most convenient side of the property.
Spacing is a planning guide, not a reason to install a station in an unsuitable location. Adjust a proposed point when it conflicts with concrete, dense roots, underground services or an area that is regularly disturbed. Note the change on the map so the final positions remain easy to find.
Mark higher-risk locations
After plotting general perimeter coverage, identify locations where termite activity may be more likely or more difficult to notice. The supplied installation information specifically highlights wood piles, tree stumps and wooden fences. Also note areas with excess water runoff or soil-to-wood contact, as these conditions can be relevant when deciding where monitoring is useful.
Where a vulnerable feature falls between two regular perimeter points, consider whether one station should be positioned nearby rather than following an even interval exactly. Record the feature beside the station number—for example, “Station 4, beside rear fence” or “Station 7, near stump.” This makes inspection notes more meaningful later.
Keep stations accessible
Choose locations that can be reached for inspection without moving heavy objects or disturbing garden features. Avoid placing stations where they are likely to be covered by stored materials, regularly driven over or damaged by routine landscaping. The station should remain identifiable on the ground and on your plan.
Before digging, check the intended points for underground services and other obstructions. The Demise installation guidance specifies a hole approximately 130 mm wide and 200 mm deep. Use the supplied directions and suitable digging equipment, and do not proceed at a point where the required hole cannot be made safely.
Record the final positions
Once the stations are installed, update the sketch rather than relying on the original plan. Measure each station from a permanent reference, such as a building corner, and add a short location description. A useful record might include:
- Station number and approximate position
- Nearest building corner or fixed feature
- Installation date
- Nearby wood, moisture or soil-to-wood conditions
- Inspection date and whether activity was observed
Photographs can supplement the map, especially for stations in dense planting. Take a wider image showing the surrounding area and a closer image showing the station location. Avoid relying on photographs alone because landscaping and seasonal growth can change the appearance of a site.
Match the map to inspection intervals
The Demise system is initially monitored at approximately 8–12 week intervals. Use the map as a checklist and inspect every numbered station, not only those closest to the house or those that look most vulnerable.
If termite activity is found, record the station number and follow the supplied baiting directions. The product information states that ABIDE termite bait is mixed with bottled water into a paste and placed directly into the active station using gloved hands. Active stations are then inspected at approximately 7–14 day intervals, with bait replenished as required until feeding activity has ceased.
Plan for continued monitoring
Mapping is not finished when the stations are buried. After feeding activity stops, the stations can be removed and cleaned, fitted with new bait wood blocks and returned to the ground for continued monitoring. Keep the map updated if a station is moved, reset or replaced.
The 10-station Demise kit includes 10 in-ground stations, four 100 g bags of ABIDE termite bait, ten 50 g bags of CONVERGE termite activity accelerant and 20 bait wood blocks. Treat the map as part of the system: it helps you use the available stations methodically and creates a record of conditions over time. Keep bait components away from children and pets, and seek professional termite assessment if an infestation or structural damage is suspected.
 Mosquito Traps