


How to Prepare and Apply TERM-seal Aqua Block Plus for a Continuous Barrier

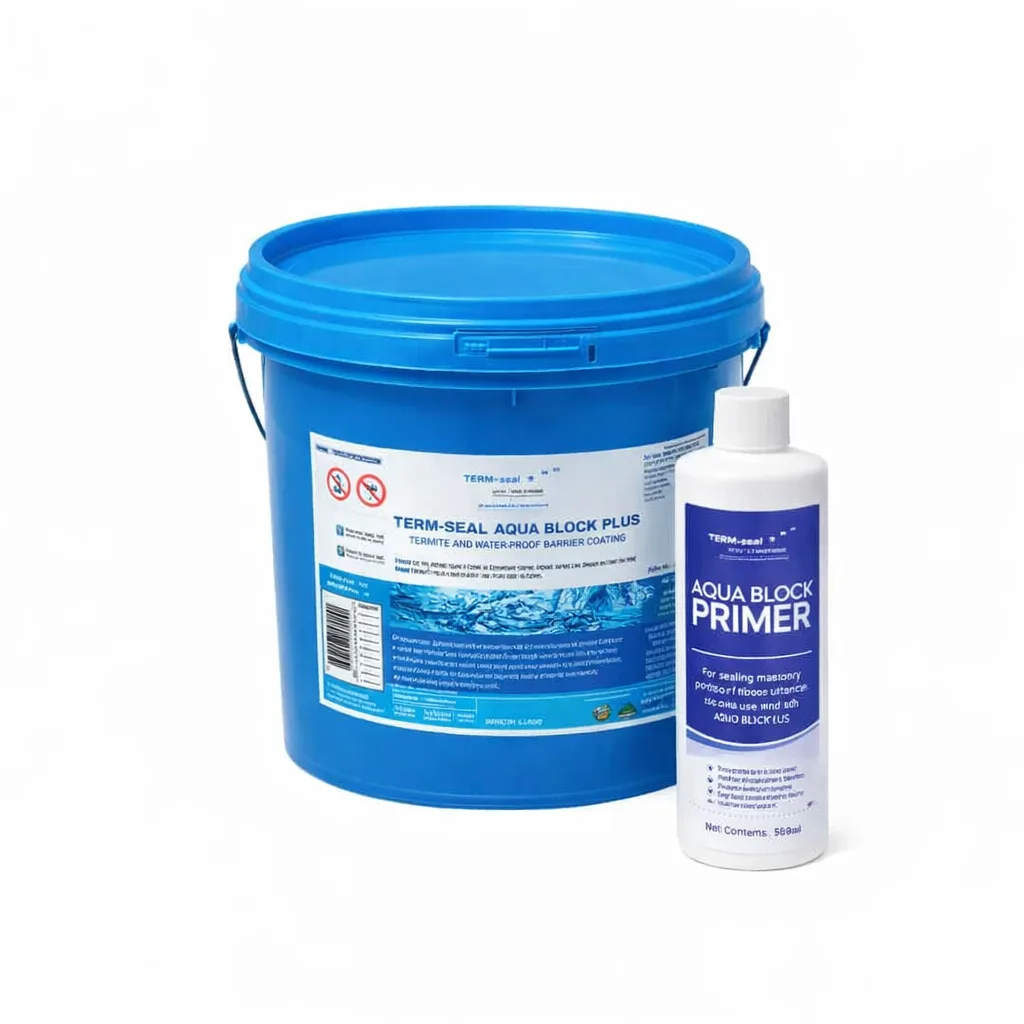
Creating a continuous termite barrier depends on more than spreading coating across a wall or slab edge. With the TERM-seal Aqua Block Plus bundle, the preparation stage, matched primer and uninterrupted application all contribute to a reliable termite-resistant and waterproofing membrane on suitable surfaces.
At a glance
Bundle Contents
The bundle includes 4L of Aqua Block Plus coating and 500ml of matched primer.
Prepare Surfaces
Clean and prime compatible surfaces before applying the coating.
Maintain Continuity
Apply the coating by brush or roller without leaving gaps or pinholes.
Build Required Thickness
Slab-edge treatment requires two coats with a 1.3mm minimum thickness.
Allow Full Cure
Allow at least 48 hours before returning soil to treated backfilled walls.
What the bundle contains
This bundle combines 4L of TERM-seal Aqua Block Plus with 500ml of TERM-seal Aqua Block Primer. The two products are intended to work together: the primer prepares the substrate, while the Aqua Block Plus coating cures to form a seamless, flexible membrane.
The coating is an acrylic polymer-based liquid containing bifenthrin as the identified termite-control agent. It is designed for compatible masonry, brick, concrete and fibrous-panel surfaces, including building areas where concealed termite entry or water penetration needs to be addressed.
Before application
Confirm that the proposed substrate is suitable and that the treatment area can be covered as a continuous run. Typical locations may include slab edges, walls, construction joints and other compatible building surfaces. The product should not be treated as a replacement for a complete termite-management plan or a professional assessment where access, damage or termite activity is complex.
Check the current product label and technical instructions before starting. Coverage, drying and curing requirements can vary with the substrate and application conditions. Also confirm that the coating quantity is adequate for the area and required build-up; the supplied 4L quantity does not establish a universal coverage rate.
Step 1: Clean the surface
Remove dust, dirt and other contamination from the treatment area. Surfaces should be sound and free from dry, loose material that could interfere with adhesion. Waxes, mould-release agents and similar contaminants should also be removed.
Where mould, lichen or fungal growth is present, treat it with a suitable product, rinse as directed and allow the surface to dry completely before proceeding. Pay particular attention to slab edges, joints, corners and changes in plane, because overlooked contamination or debris can interrupt the barrier.
Step 2: Apply the matched primer
Once the surface is clean and ready, apply TERM-seal Aqua Block Primer according to the current label directions. Priming is especially important on porous, friable or dusty surfaces, where it helps prepare the substrate for the Aqua Block Plus coating.
Allow the primer to reach the condition specified by the manufacturer before applying the coating. Do not skip this stage simply because the surface appears clean: the bundle is supplied as a primer-and-coating system, and the primer is the specified preparation product for Aqua Block Plus.
Step 3: Apply Aqua Block Plus continuously
Apply the coating by brush or roller to the required prepared area. Work methodically so the membrane remains unbroken across the intended treatment zone. Maintain coverage through corners, edges and transitions, and avoid leaving pinholes, gaps or uncoated sections.
Slab edges
For a slab edge, the surface should be cleaned and primed before treatment. Apply a continuous coat of TERM-seal Aqua Block Plus, then, when dry, apply a second coat to achieve a minimum total thickness of 1.3mm as specified in the product guidance.
Construction joints
Clean the concrete at least 60mm on either side of the joint, then apply the primer. A thick continuous coat of Aqua Block Plus is applied along the joint, followed by the specified reinforcing band where required. Remove air pockets as the band is embedded, cover it with another thick coat and apply the further coat required by the product instructions after the topcoat has set.
Walls, concrete and masonry
For general wall, concrete or masonry applications, clean and prime the surface before coating. The barrier should have a minimum width of 50mm in these situations. Keep the treated line continuous and check the finished membrane for thin spots or visible breaks.
Backfilled areas and curing
Where a backfilled wall may be exposed to hydrostatic water pressure, the product guidance specifies a minimum application thickness of 4mm at joints. Protect the treated wall with corflute or another suitable protective cover so backfill debris cannot penetrate the membrane.
Allow at least 48 hours for TERM-seal Aqua Block Plus to cure before returning soil to the wall area, while also following the current label and the conditions on site. Cooler, wetter or otherwise unsuitable conditions may affect drying and curing, so do not backfill until the system is ready.
Application precautions
- Read the current label, technical directions and Safety Data Sheet before use.
- Wear appropriate personal protective equipment and avoid contact with eyes and skin.
- Provide adequate ventilation and avoid inhaling spray mist or vapour if the product is applied by spraying.
- Store and handle the coating and primer as directed by the manufacturer.
- Obtain qualified pest-management or building advice where termite activity, access or construction details are difficult to assess.
A continuous barrier is the result of careful substrate preparation, complete primer coverage, correctly built-up coating layers and sufficient curing time. Inspect the finished work before it is concealed, and resolve any gaps or damaged sections in accordance with the current TERM-seal instructions.
 Mosquito Traps